


BuySignLetters- STUD-PAD-COMBINATION-INSTALLATIONS
|
STUD PAD COMBINATION INSTALLATIONS
|
||
| Installation patterns are recommended for pad stud combination installations and are available by (Clicking Add Installation Pattern on the item total page) If you have 2 signs you need 2 patterns |
1) Masking Tape |
|
|
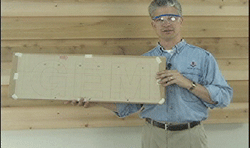
1) Tape the Installation pattern to a piece of even cardboard with masking tape. This makes it easy to get a flat surface over corrugations. |
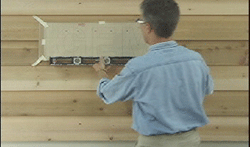
2) Tape one edge of the Installation pattern to the installation surface with masking tape and level the pattern and tape the other edge to the installation surface. |
|
|
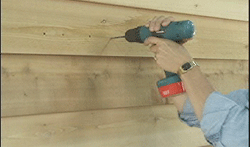
3) Punch and drill 1/4" holes 3 inches deep where indicated on your template. Remove the template and clean out all drill holes: a puff of air threw a straw works well.
|
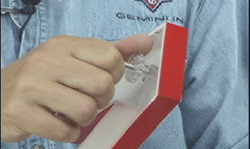
4) Screw the studs and the pads into the stud holes on the back of each letter. Place the letters into the holes that you just drilled and prefit them in and adjust the pads to get a even flat mount. |
|
|
5) Apply 100% pure silicone and push the letters into the drill holes, then apply masking tape to hold the letters up while the silicone is drying. Repeat steps 3 through 5 for the rest of the letters. |
How to avoid common INSTALLATION problems
|
|